Lesson 1: Getting to Grips with Leather Gloves

A stiff, dusty glove from the attic is the perfect first project. Leather is forgiving, and you will see real progress in a single weekend.

Begin Step One
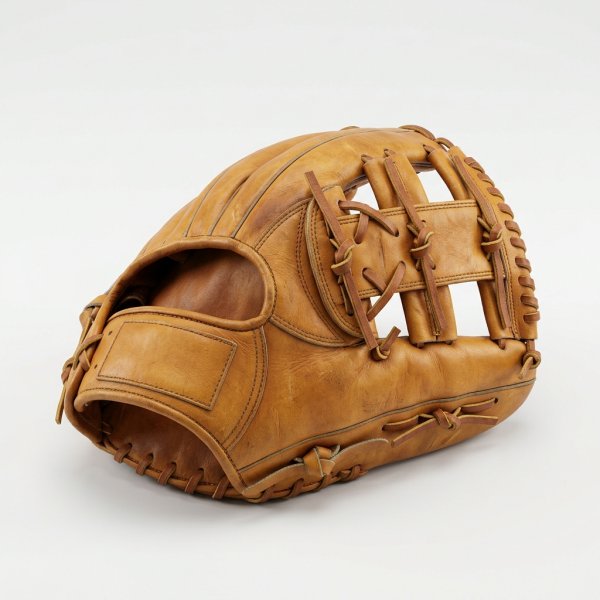
Soft-lit 3D render of a tan leather baseball glove on a plain white background

Read the Glove Before You Touch It

Before any cleaner comes out, spend ten quiet minutes just looking. Hold the glove under good daylight and turn it slowly. Is the leather dry and dusty, or is it brittle and cracking when you flex a finger? Are the laces intact, frayed or snapped? Is there mold, which shows as a fuzzy white or green bloom, often inside the fingers?

Look for the maker's stamp, usually on the palm or the wrist strap. Names like Rawlings, Wilson, Spalding or Nokona help you date the glove and decide how careful to be. A signature model from the 1950s may be worth far more untouched, while a 1990s department store glove is a perfect practice piece. If you suspect real value, stop here and ask an appraiser. Museums such as the National Baseball Hall of Fame in Cooperstown keep old gloves stable rather than making them look new, and that mindset is worth borrowing.

Take photos from every angle now. They are your "before" pictures and your map if you need to relace later.

Clean Gently, From Dry to Damp

Start dry. A soft brush, like a clean shoe brush or a soft toothbrush, lifts loose dirt from seams and the pocket. Work outward from the palm. Then shake the glove upside down; you will be surprised what falls out.

Next, move to damp, never wet. Lightly dampen a cloth, add a tiny amount of saddle soap or a pH-balanced leather cleaner such as Lexol Cleaner, and work in small circles. Wipe the lather away with a second barely damp cloth straight after. Soaking a glove in water or running it under a tap can make leather shrink and harden as it dries, so keep moisture minimal.

For mold, wipe gently with a cloth slightly dampened with a mix of water and a little isopropyl alcohol, outdoors, wearing gloves and a mask. Let it air dry away from heaters and direct sun.

Condition Sparingly

Now that the leather is clean, it is ready to drink. Conditioners put back the oils that decades have pulled out. Popular choices include Lexol Conditioner and dedicated glove oils from makers such as Rawlings and Nokona. Neatsfoot oil, and especially "neatsfoot oil compound," is traditional but darkens leather and can make it heavy and floppy if overused.

Always test on a hidden spot, like the inside of the wrist strap, and wait a day. If you like the result, apply a thin layer with your fingers or a soft cloth, let it soak in for an hour, then buff away anything left on the surface. Less is more: two light coats a few days apart beat one heavy one. Never use petroleum jelly, cooking oil or shaving cream; they can attract dirt, turn rancid or break down stitching over time.

Relace Only What You Need

Broken laces are the most common glove problem and the most satisfying fix. You need rawhide glove lace in a matching color and width, and a lacing needle, sold together as inexpensive kits. Begin with one broken section rather than the whole glove. Use your "before" photos to follow the original path through each hole.

Pull each pass snug but not crushing tight, and tie off with a simple knot hidden on the inside or under the heel. Many beginners find the web and finger tips easiest to start with; a full relace can wait until you feel confident. If an old lace is only dry rather than broken, a little conditioner may be all it needs.

Reshape and Rest

Your final step is patience. Place a baseball in the pocket, close the glove around it and hold it with a wide rubber band or soft strap. Let it rest for a few days at room temperature. Avoid ovens, microwaves and hair dryers: heat speeds up drying in the moment but leaves leather brittle in the long run.

Store the finished glove somewhere cool and dry with airflow, not sealed in plastic. Wipe it down and give it a light conditioning once or twice a year. Congratulations: you now know how to look, clean, nourish, repair and rest leather. Those same skills come straight back in the next lesson on classic bicycles, where leather saddles wait for you, and in wooden rackets and bats.